Showing posts with label Recipes. Show all posts

On the Menu: Southwest Cornbread

Southwest Cornbread

Active Prep Time: 30 minutes 
Bake Time: 30 minutes

Ingredients

1 lb ground beef
1/2 onion – chopped finely
Salt and pepper – to taste
1 teaspoon garlic powder
1 8 1/2-ounce box corn bread and muffin mix
1 egg
1/3 cup milk
1 can cream-style corn
2 cups pepper jack cheese – shredded

Directions

Preheat oven to 350 degrees.  Butter the bottom and sides of a large casserole dish.

Brown and drain ground beef and onion.  Add seasoning and stir well.

In a small bowl, combine corn bread mix, egg, milk, and corn.  Stir well.

Pour 1/2 cornbread mix in casserole dish.  Add ground beef and spread evenly.  Add cheese evenly.  Add remaining cornbread mix.

Bake for 35 – 40 minutes.

My Changes:

When browning the beef, I added a minced garlic clove and beef base in addition to what the recipe calls for. I may have also added some chili powder and a smidge of cayenne at the last minute but don’t tell my hubby that. He’s blissfully unaware *evil grin*.

My Thoughts:

I did enjoy this recipe but I think I’ll make some additional changes the next time. The cornbread, while delicious, kind of overpowered…well just about everything else. I think I may try cutting the cornbread mixture in half and only putting it on top when baking. I would also add more corn (regular corn, not cream style).

Recipe & Image Source: The Meal Planning Mom Blog


Friday Foodie Affair: Tuna Times Two


For some crazy reason I’m on a tuna kick so I hunted down a couple recipes to try, Tuna Pasta Salad and Tuna Quesadilla. I, of course, tweaked both recipes to suit my bland food loving taste buds :-P


Tuna Pasta Salad


Ingredients:

8 ounces dry whole-grain elbow pasta (Barilla Plus recommended)
1 cup frozen green peas
5 ounces canned tuna, packed in water
½ cup chopped broccoli
¼ cup balsamic vinaigrette

Directions

Combine pasta and peas in a large bowl with tuna, celery and balsamic vinaigrette. Season with ¼ teaspoon kosher salt and freshly ground black pepper to taste; mix well to combine. Serve slightly chilled or at room temperature. Enjoy this salad as is or pile it over mixed greens.

Note: the original recipe has nutritional information if you’re curious.

My version of this was WAY different because…well I wasn’t really following the recipe. I accidentally used a whole box of pasta instead of half so my proportions were all wrong. I also forgot to buy peas so I used kidney beans instead. Oh, and I substituted vinaigrette for fat free Italian dressing. Like I said WAY different, haha. But the important thing is that it was very tasty even with the differences. This was also my favorite of the two recipes in this post.

My Ingredients:

1 box whole-grain elbow pasta (Barilla Plus)
Kidney Beans
3 cans tuna in water
¼ cup fat free Italian dressing
Reduced fat shredded cheddar cheese


Tuna Quesadilla


Ingredients:

2 small (3-ounce) cans tuna, drained and flaked
½ cup salsa, drained
½ cup chopped fresh scallions
1 cup shredded cheddar
3 (12 inch) flour tortillas

Directions:

Mix tuna with salsa and scallions. Fold in cheddar. Divide mixture into 1/3’s and spread each portion over ½ of a tortilla and fold into a half circle. Brown each of the 3 quesadillas on both sides in a hot pan to melt cheese. Cool a bit, cut into wedges and serve.

My Version was pretty much the same as the original except I left out the scallions and salsa. It actually ended up tasting a little too plain, even for me. I’ll have to come up with something else to add to it the next time. I also need to work on my quesadilla browning skills a bit…or I should just pay closer attention :-P


Friday Foodie Affair: Chili Dip Recipe Review


Chili Dip


Pic Source, their recipe is a little different but generally the same concept.
 
I was going to make a batch and take my own picture but I, uuuhhhh, kind of ate the cream cheese before that happened...oopsies :-P. My pretzels just threw themselves into the cream cheese so really what could I do?!


Ingredients:

1 can Hormel Chili (with or without beans, your choice)
1 package Cream Cheese (at room temp)
1-2 cups shredded cheddar cheese
Tostitos Scoops (or whatever chip you prefer)

Directions:

-Spread cream cheese in bottom of a cake pan (I used an 8 x 8 glass baking dish).
-Cover cream cheese with the chili.
-Top with shredded cheese.
-Bake at 375 until the cheese is melted and it’s warm in the middle.

My Thoughts:

Aw man this stuff is good!! Seriously, it's the shit! Who even needs chips; I would happily eat it right out of the container. I may or may have not done just that...but I will admit to nothing!  Mmmmm, I'm drooling just thinking about it. The cheesy goodness....mmm. I also love canned chili so it was win, win, win! Plus it's very simple to make (my favorite way to cook), just layer the ingredients, bake, and tada! I definitely recommend it to any cheesy chili lovers...wait, did I just call you all cheesy?! Well you know what I mean ;-)

How I came across it:

I was searching for a quick and easy recipe back around superbowl time and Anna (Annaberry Reads) came to my rescue with this delish dish! Her version is made in the crockpot but I’m sure it ends up tasting the same. Thank you Anna!!!

Friday Foodie Affair: Frozen Yogurt Drops Recipe Review


Freezer Yogurt Drops


Ingredients:

Your favorite yogurt flavor(s)


Supplies:

Spoon
Scissors
Sandwich baggie or cake decorating bag
Plates or cookie sheet (depending on the size of your freezer)
Wax paper


Directions:

-Place wax paper over your plates and/or cookie sheet. I have a side by side freezer so I use plates. 1.5 plates per container of yogurt.

-Spoon or dump yogurt into your baggie. I’ve found that it’s easiest to dump what I can and then spoon out what’s left in the container.


-Twist baggie so you can avoid air pockets or shooting yogurt out of the top of your bag.

-Cut the corner of your baggie. Don’t cut too big of a corner or you’ll have quite the mess on your hands. The yogurt will start coming out right away so be close to your plate and ready to go.


-Place drops of yogurt on your plate.

-Once out of yogurt place plates in the freezer for about an hour. Once they’re formed just peel them off the wax paper and you’re all set.


Note: If you get yogurt with fruit chunks it will clog your bag over and over. It can get annoying and it’s also sometimes very messy if you decide to squeeze harder to shoot it out…not that I’ve done that at all. Nope, not at all.

My Thoughts:

Popcorn used to be my low calorie snack food but now I’m completely obsessed with yogurt drops. The drops keep me occupied longer than just about any other snack so it feels like I’m eating more than I actually am. Plus it’s good for you! Win, win!

You can do the same thing with applesauce but I end up being lazy and just throw the small cups in the freezer instead.

I have also seen that some people will dip fruit in yogurt and then freeze it. Sounds quite tasty!

Friday Foodie Affair: Cake Batter Cracker Dip


 ...where I profess my love for food and food related things.

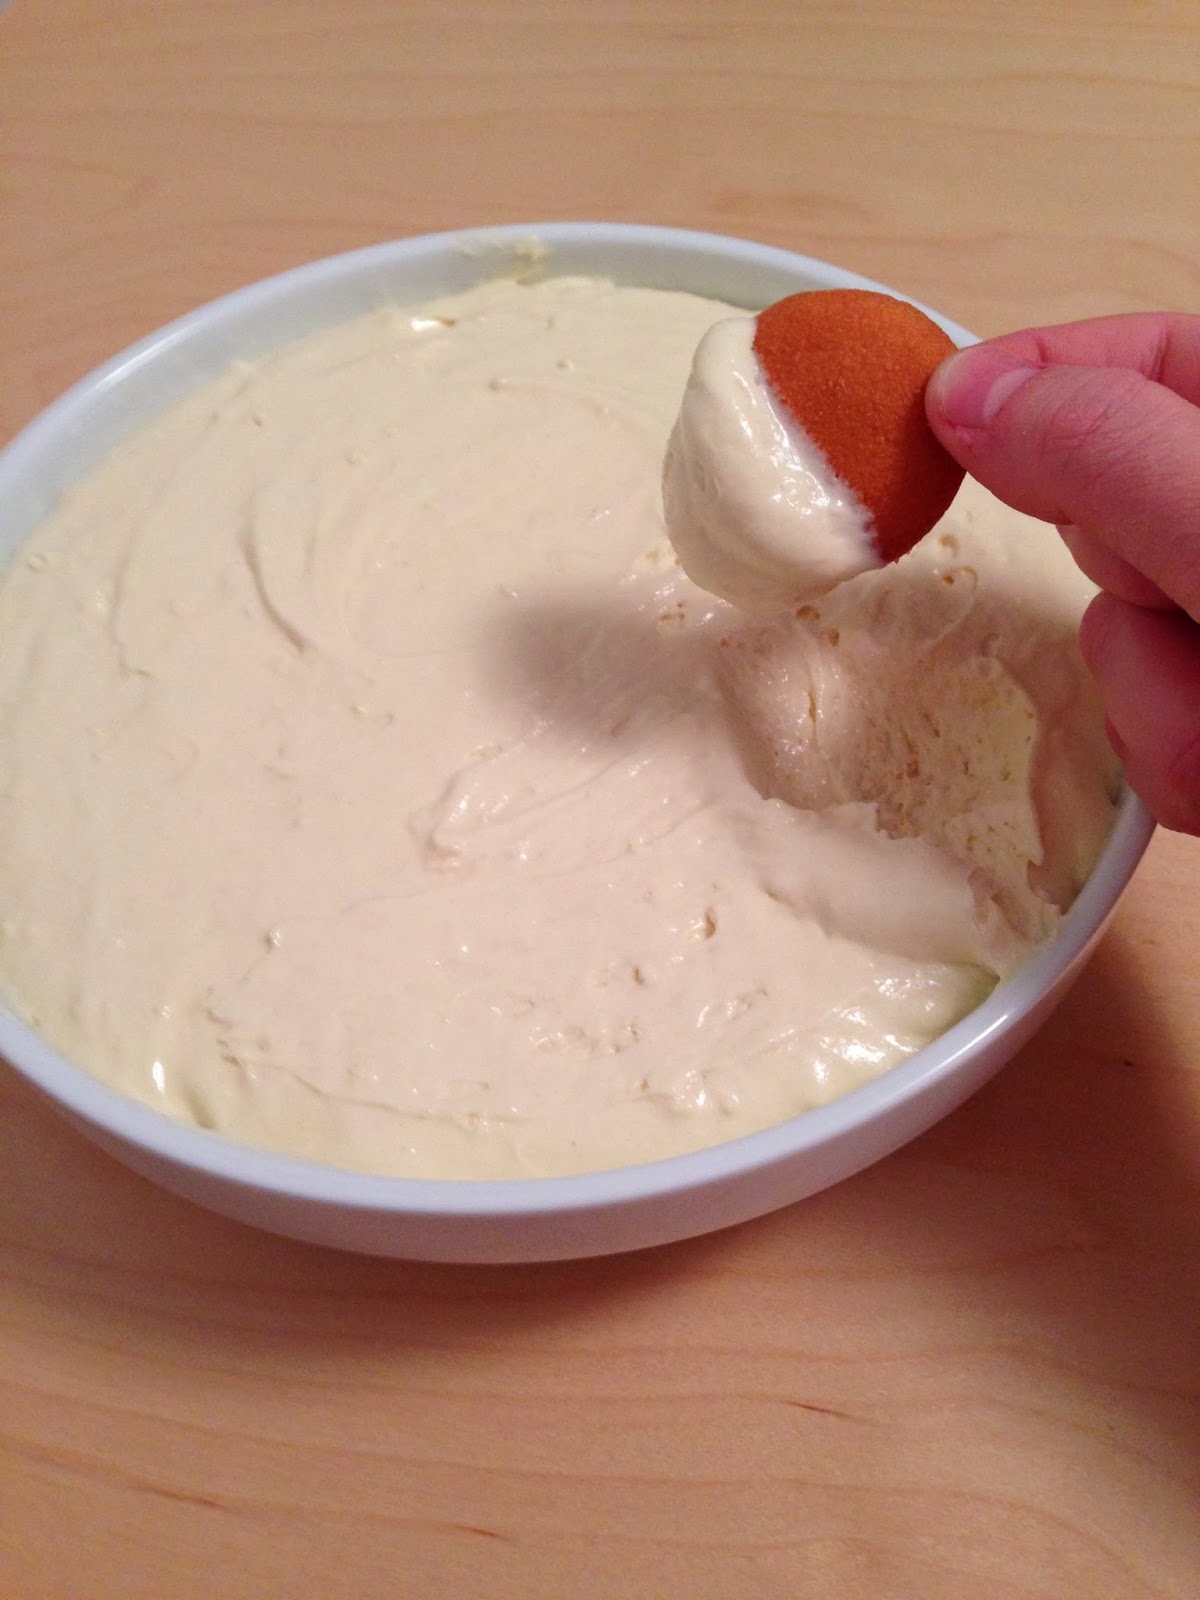
Cake Batter Cracker Dip


This photo is from the recipe source, the other
photos in the post are ones that I took.

Prep Time 5 Minutes
Servings 20 
Difficulty Easy 

Ingredients

1 package (about 18 Oz. Size) Cake Mix, Any Flavor
1-½ cup Plain Yogurt
2 cups Whipped Topping

Preparation Instructions

In a large bowl, combine all the ingredients and mix until smooth and creamy. Chill for at least 1 hour before serving with your favorite crackers or fruit.This will store up to 3 days in the refrigerator.


My Thoughts

You can't get any easier than this recipe, it's only three ingredients mixed together. I have made this dip twice and used nonfat yogurt and lemon cake mix both times. Eventually I will try other combinations (maybe chocolate?) but the lemon is heavenly and I had to have it a second time.  

Recipe Source:

I heard about this recipe from my friend, Emmalee and then found the Recipe source online.

Friday Foodie Affair: Homemade Peppermint Patties


 ...where I profess my love for food and food related things.


Homemade Peppermint Patties

This photo is from the same source as the recipe. 
The rest of the photos in this post are ones that I took.

Serves: Makes about 8 dozen.
Ingredients:
1 pound confectioners sugar (powdered sugar)
4 ounces,  cream cheese, softened
¼ teaspoon peppermint extract
6 ounces semi-sweet chocolate chips
Directions:
1. Using a mixer, gradually add the sugar to the cream cheese, beat well until incorporated.
I find that it's easier if you start with the mixer before switching to mixing with your hands. I think that's just a flash back to the way my mom did things when I was younger, we always mixed things with our hands. Just a warning though, you will get messy.

2. Add peppermint extract and combine well.
3. Roll dough into teaspoon size balls and place on baking sheet(s) lined with wax paper or parchment. Create a small “bowl” or indention in each ball using a ¼ teaspoon or your finger. Cover with plastic wrap and let firm up in refrigerator for a few hours.

4. When peppermints have firmed, melt chocolate according to package directions (microwave is fine). Fill a piping bag or freezer bag with the corner snipped with the melted chocolate. Fill each mini peppermint bowl/indention with chocolate and let cool.

If you would like to pretty them up a little you can add sprinkles or colored sugar.


5. Refrigerate in airtight container until ready to serve.
Helpful Tips: 
These are from the recipe source
  • When making the cream cheese/powdered sugar mixture, gradually add the powdered sugar until the right texture is achieved. You may end up needing to add a bit more than listed in the recipe, or less. It should hold together, but not sticky.
  • If working by yourself, only make a few balls at a time before pressing the bowls/indention’s to avoid them drying and cracking. The best thing is to work with someone else and have one person roll the balls, while the other follows behind making the bowls/indentations.
  • Be sure to keep main peppermint mixture lightly covered with plastic or a damp paper towel while making the balls to avoid it drying out.
My Thoughts:

I've made homemade candy before so this recipe wasn't difficult for me, it's just a little time consuming. 

The strength of the peppermint is up to you, you may like the more subtle flavor that comes with using the exact amount listed above but I'd suggest taste testing as you go. It took me a little while to get both the flavor and the texture right. I ended up using around 4x the amount of peppermint and more than a pound of 10x Sugar. 

Now on to the flavor. The peppermint candy part is quite tasty but once you get some chocolate in the same bite...just...wow. It's absolutely delish and it really does taste like a peppermint patty.